
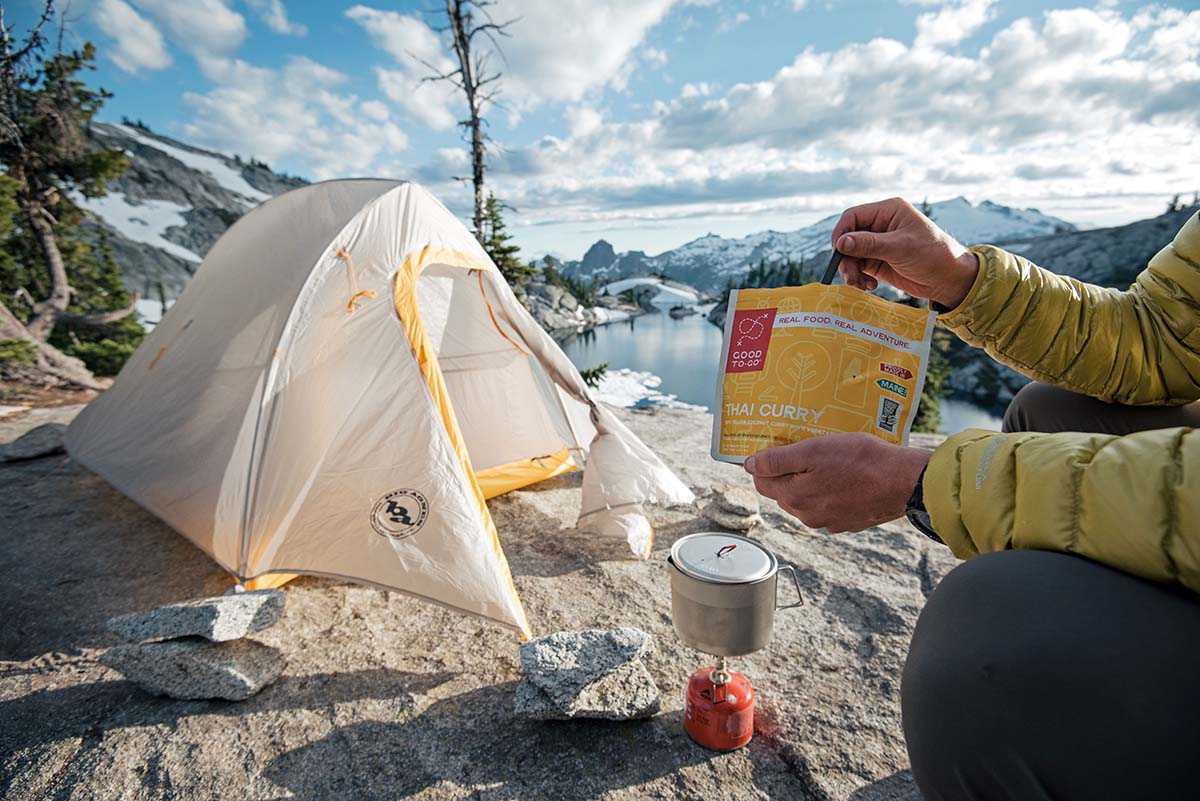
Backpacking food sack is more than just a bag; it’s a crucial piece of gear that protects your food and, more importantly, you and the wildlife you encounter. Imagine hiking through stunning landscapes, far from civilization, where hungry critters roam. A well-chosen and properly used food sack is your first line of defense against unwanted animal encounters, ensuring your food remains safe and your wilderness experience remains pristine.
This guide will walk you through everything you need to know about backpacking food sacks. From understanding their purpose and the different types available, to mastering the best practices for usage, we’ll cover it all. We’ll delve into materials, construction, and the crucial role they play in keeping both your food and the local ecosystem safe. This includes detailed instructions on hanging bear bags, choosing the right size, and minimizing your impact on the environment.
Introduction to Backpacking Food Sacks
Oi, fellas! Planning a trip to the jungle, huh? Gotta be prepared, and that includes keeping your grub safe from unwanted guests – like, say, bears or cheeky monkeys. That’s where the backpacking food sack comes in, your ultimate defense against hungry critters. Think of it as a fortress for your delicious trail mix and instant noodles.
Primary Function of a Backpacking Food Sack
The main gig of a food sack is simple: protect your food from animals. It’s designed to be resistant to punctures, tears, and the cleverest of claws and teeth. This prevents animals from getting into your food and prevents them from associating humans with easy meals. This helps keep both you and the wildlife safe.
Situations Where a Food Sack is Essential
Food sacks are a must-have in several situations.
- Bear Country: Places where bears are known to roam, like national parks in the US or parts of Canada, absolutely require a food storage system. Bears have an incredible sense of smell and can detect food from miles away.
- Areas with Other Wildlife: Even if there aren’t bears, other animals like raccoons, squirrels, or even rodents can be a nuisance and a health hazard if they get into your food.
- Anywhere You Camp: Whenever you’re camping, it’s good practice to store your food properly, even if you don’t think there are animals around. It prevents accidental spills and keeps your campsite clean.
Different Types of Food Sacks Available
There are a few main types of food sacks to choose from, each with its own pros and cons.
- Ursack: Ursacks are soft-sided, bear-resistant food bags made from a tough, flexible fabric. They’re lightweight and can be tied to a tree. They require an additional odor-resistant bag to contain the food and prevent bears from smelling it. They are often certified by organizations like the Interagency Grizzly Bear Committee (IGBC).
- Hard-Sided Bear Canisters: These are rigid containers, usually made of plastic or aluminum, that are virtually impenetrable. They are extremely effective at keeping bears out but are bulkier and heavier than Ursacks.
- Odor-Resistant Bags: These bags are often used in conjunction with Ursacks or other food storage methods. They help to minimize the scent of food, making it harder for animals to find. They are usually made from specialized materials.
- Simple Stuff Sacks: While not bear-resistant, these are useful for organizing food and keeping it separate from other gear. They can be used in combination with bear-resistant methods or for trips where animal encounters are unlikely.
Materials and Construction of Food Sacks
Alright, so you’re trying to keep your grub safe from those sneaky critters while you’re out in the wild, right? Food sacks are the bomb for that, and knowing what they’re made of and how they’re built is key. Let’s break down the materials and construction of these life-saving sacks, Pontianak style!
Materials Used in Food Sack Construction
The materials used in food sacks are super important because they directly impact how well your food is protected and how easy the sack is to carry. There are a few main players in the game, each with its own set of strengths and weaknesses.
- Nylon: Nylon is a popular choice, and for good reason. It’s strong, lightweight, and relatively affordable. Think of it like the reliable friend who’s always there for you. It’s pretty resistant to tearing and abrasion, making it good for rough handling. However, it can be susceptible to UV degradation (the sun’s rays can weaken it over time), and some nylon sacks might not be completely animal-proof on their own.
- Polyester: Similar to nylon, polyester is another synthetic material used in food sacks. It’s known for its excellent UV resistance, so it won’t break down as quickly in the sun. It’s also pretty good at repelling water. The downside? It might not be quite as strong as some types of nylon, so it could be more prone to tearing.
- Spectra/Dyneema: This is the heavy-duty, super-tough stuff. Spectra and Dyneema are ultra-high-molecular-weight polyethylene fibers that are incredibly strong and resistant to abrasion. They’re like the superheroes of food sack materials. These materials are also very lightweight, which is a huge bonus when you’re trying to keep your pack weight down. The main downside?
They can be more expensive than nylon or polyester.
- Combination Fabrics: Sometimes, food sacks use a combination of materials to get the best of both worlds. For example, you might find a sack that uses a Spectra/Dyneema blend for the main body and nylon for the closure system. This is like a custom-made outfit designed for maximum protection and practicality.
Construction Features for Durability and Animal Resistance
How a food sack is put together is just as important as what it’s made of. The construction features directly influence how well it stands up to hungry animals and general wear and tear.
- Reinforced Seams: This is where the fabric pieces are sewn together. Reinforced seams are crucial because they’re the weakest points in the sack. Look for sacks with double-stitched or bar-tacked seams (those little zigzag stitches that reinforce stress points). This helps prevent tears and rips if an animal tries to get at your food.
- Heavy-Duty Closures: The closure system is the gatekeeper to your food. It needs to be secure and difficult for animals to manipulate. Options include:
- Roll-Top Closures: These involve rolling the top of the sack multiple times and then securing it with a buckle or strap. The multiple rolls create a tight seal that’s hard for animals to get past.
- Zipper Closures: Some sacks use heavy-duty zippers. Make sure the zipper is made of a durable material and has a tight seal.
- Drawcord Closures: While not as secure as roll-top or zipper closures, drawcord closures can be a good option for lightweight sacks.
- Abrasion-Resistant Fabrics: Fabrics like Spectra/Dyneema are naturally abrasion-resistant, meaning they can withstand rubbing and scraping against rocks and other rough surfaces. This is important because a sack that’s constantly rubbing against things is more likely to wear down over time.
- Animal-Resistant Hardware: Some food sacks incorporate features like reinforced handles, straps, and buckles that are designed to withstand the chewing or clawing of animals. These are usually made of strong materials like stainless steel or heavy-duty plastic.
Impact of Materials on Weight and Packability
Weight and packability are super important, especially when you’re backpacking and every gram counts. The materials used in your food sack have a big impact on both.
In this topic, you find that top rated koi food is very useful.
- Weight:
- Lightweight Materials: Spectra/Dyneema is the clear winner here. It’s incredibly strong, but also super light.
- Moderate Weight Materials: Nylon and polyester are generally in the middle of the weight range.
- Heavier Materials: Some food sacks might use thicker, more durable materials that add a bit more weight.
- Packability:
- Compressibility: The ability to compress the sack down is important. The more packable, the better. Materials like nylon and polyester can usually be compressed quite well. Spectra/Dyneema is also pretty packable, although the stiffness of the fabric can sometimes affect how small it can be squished down.
- Shape and Design: The overall shape and design of the sack also affect packability. Sacks with a more cylindrical shape tend to pack better than those with lots of angles or pockets.
- Real-World Examples: Let’s say you’re planning a week-long trek. You might opt for a lighter, more packable nylon sack to save weight. If you’re going somewhere known for aggressive bears, you might prioritize a heavier-duty Spectra/Dyneema sack, even if it means carrying a bit more weight. It’s all about balancing protection, weight, and packability to fit your specific needs.
Types of Food Sacks
Alright, fam, now that we’ve got the basics down, let’s dive into the real deal: the different types of food sacks you can sling on your back. Choosing the right one can seriously make or break your backpacking trip, so listen up! We’re gonna break down the pros and cons of each, Pontianak style, so you can make the best choice for your adventures.
Bear-Resistant Food Canisters
Bear canisters are the ultimate guardians of your grub when you’re hiking in bear country. These are basically super-tough, hard-sided containers designed to keep even the most determined bears from getting to your food. They’re mandatory in many areas, so knowing about them is a must.These are the main characteristics of bear-resistant food canisters:
- Construction: Typically made from durable, hard plastic like polycarbonate. They’re built to withstand crushing, clawing, and chewing.
- Shape: Usually cylindrical or rectangular, with smooth surfaces to make it difficult for bears to get a grip. Some have rounded edges to prevent them from being easily rolled away.
- Closure: Require a specific locking mechanism, often requiring a tool or a particular technique to open. This is crucial to prevent bears from figuring out how to access your food.
- Capacity: Available in various sizes, typically ranging from 600 cubic inches to over 1000 cubic inches. The size you need depends on the length of your trip and the amount of food you’re carrying. Always overestimate!
- Weight: They’re heavier than other food storage options, adding significant weight to your pack. This is the main drawback.
- Regulations: Specific canisters are often approved by organizations like the Interagency Grizzly Bear Committee (IGBC). Make sure to check local regulations, as some areas may require specific models.
Here’s the deal: Bear canisters are seriously effective. They’ve been tested and proven to protect food from bears. However, they’re also bulky and heavy. Think of it like wearing a suit of armor – effective, but you’ll feel it.
Odor-Proof Food Sacks
Odor-proof food sacks are designed to minimize the smell of food, reducing the chance of attracting animals, especially critters like mice and rodents. They’re not a replacement for bear canisters in bear country, but they can be a helpful addition to your food storage strategy.Here’s the lowdown on odor-proof food sacks:
- Materials: Typically made from layers of specialized materials like activated carbon, polyethylene, and foil. These layers work together to absorb and contain food odors.
- Sealing: Feature airtight closures, such as a roll-top with buckles or a ziplock-style seal. A good seal is critical to keeping odors contained.
- Effectiveness: While they can significantly reduce odors, no sack is 100% odor-proof. They are more effective at containing strong smells.
- Usage: Place your food items inside the sack, then seal it tightly. You can then hang the sack from a tree or store it inside a larger container.
- Maintenance: Regularly clean the inside of the sack to remove any food residue, which could start to smell. Allow the sack to air dry completely after cleaning.
Odor-proof sacks are a smart choice for areas with rodents and other small animals. They can also be helpful for reducing the chance of attracting larger animals like deer. However, remember that they’re not a substitute for proper bear-resistant storage in areas where bears are present. They are more like a secondary layer of protection.
Stuff Sacks for Food Storage
Stuff sacks are the simplest and most versatile option for food storage. They come in various sizes, materials, and shapes, and can be used for a wide range of purposes.Here’s a look at the benefits and drawbacks of using stuff sacks for food storage:
- Pros:
- Lightweight: Stuff sacks are generally very light, adding minimal weight to your pack.
- Versatile: They can be used for various other purposes, such as organizing gear or compressing clothing.
- Inexpensive: Compared to other food storage options, stuff sacks are relatively affordable.
- Cons:
- Not Bear-Resistant: Stuff sacks offer no protection against bears or other animals that can easily tear through the fabric.
- Odor Permeable: Most stuff sacks are not odor-proof, and food smells can easily escape, attracting animals.
- Durability: The durability of a stuff sack depends on the material, but they can be prone to tearing or damage if not handled carefully.
Stuff sacks are best suited for situations where there’s a low risk of animal encounters. They’re ideal for organizing food inside a bear canister or storing food that’s been properly hung. Always pair them with other food storage strategies if you’re hiking in areas with wildlife. They’re the budget-friendly option, but you’ll need to be extra cautious about your food and how you store it.
Choosing the Right Food Sack for Your Trip
Alright, Pontianak backpackers, selecting the right food sack is like choosing the perfect lipstick shade – it needs to fit the occasion! Get it wrong, and you’re dealing with a hungry, grumpy you and possibly some unwanted critter guests. Let’s dive into how to pick the perfect food sack partner for your adventures, keeping in mind trip specifics and the local wildlife scene.
Factors for Food Sack Selection
Choosing the right food sack isn’t a one-size-fits-all deal. Several factors play a role in making the right choice for your backpacking trip. Considering these aspects will ensure your food is secure and your experience is smooth sailing (or hiking!).
- Trip Length: The duration of your trip directly impacts the amount of food you’ll be carrying, which dictates the size of the food sack you’ll need. A weekend getaway requires less space than a multi-week expedition.
- Location: Different locations present different challenges. Areas with high bear populations require bear-resistant canisters or highly effective food sacks, while regions with smaller critters might only need a basic, odor-resistant sack.
- Potential Animal Threats: Are you in bear country, or are you dealing with squirrels and raccoons? The type of animals you might encounter influences the level of protection your food sack needs. Bear-resistant canisters offer the highest level of protection, while simpler sacks may suffice in less risky areas.
- Personal Preference: Consider your comfort level and how much weight you’re willing to carry. Some food sacks are heavier than others, and some designs are easier to use.
Determining the Appropriate Size Food Sack
Figuring out the right size food sack is a crucial step in planning your backpacking trip. This will help you make the right choices for your trip.
- Weekend Trips (1-3 days): For short trips, a smaller food sack (around 5-10 liters) will likely suffice. Pack only the essentials to minimize weight and bulk.
- Longer Trips (4-7 days): A medium-sized food sack (10-20 liters) is generally needed. You’ll need space for a week’s worth of food, plus some extra room for snacks and potential overpacking.
- Extended Expeditions (7+ days): For longer adventures, a larger food sack (20+ liters) is essential. You’ll be carrying a significant amount of food, so ensure the sack is durable and easy to pack.
- Consider Volume, Not Just Dimensions: Pay attention to the sack’s volume (liters or cubic inches) rather than just its dimensions. This tells you the actual capacity.
Comparing Food Sack Types
Understanding the features of different food sack types is important for making an informed decision. The following table compares various types, highlighting their key characteristics.
| Food Sack Type | Material | Features | Pros | Cons |
|---|---|---|---|---|
| Standard Food Sack | Nylon or Dyneema Composite | Drawstring closure, sometimes with odor-resistant properties | Lightweight, affordable, effective against small animals. | Not bear-resistant; offers limited protection. |
| Bear-Resistant Food Sack | Heavy-duty, tear-resistant fabric (e.g., Spectra) | Typically with a secure closure system and sometimes with reinforced seams. | Provides excellent protection against bears and other large animals. | Can be heavier and more expensive than standard food sacks. |
| Bear Canister | Hard-sided, durable plastic | Screw-top lid, designed to be crush-resistant and bear-proof. | Offers the highest level of protection against bears. | Heavier and bulkier than food sacks; requires specific hanging techniques. |
| Odor-Resistant Food Sack | Specialized fabrics with activated carbon or other odor-absorbing materials. | Designed to minimize odors that attract animals. | Helps to reduce the risk of attracting animals. | Effectiveness can vary; may not be as effective against bears. |
Food Sack Usage
Alright, food sack fam! Now that you’ve got your awesome sack sorted, it’s time to actuallyuse* the thing. This ain’t just about chucking grub in and hoping for the best, ya know? We’re talkin’ about keeping your food safe from critters, maximizing space, and keeping that funky smell down. Let’s get down to business and make sure your food sack game is strong, Pontianak style!
Proper Methods for Hanging a Food Sack (Bear Bag)
Hanging your food bag correctly is
crucial* for keeping bears (and other hungry critters) from getting at your stash. You wanna hang that bag high enough that they can’t reach it, and far enough from the tree trunk that they can’t climb up and grab it. Here’s the lowdown
There are a few methods for hanging a bear bag, each with its own pros and cons. The most common and effective method is the “PCT Method” or “Counter Balance Method”.
- Find the Right Tree: Look for a sturdy tree with a strong branch at least 12 feet off the ground and 6-8 feet away from the trunk. Ideally, the branch should be horizontal and free of smaller branches that could act as a bridge for critters.
- Gather Your Gear: You’ll need a rope (at least 50 feet), a carabiner (optional but helpful), and your food sack.
- The Throw: Tie a rock or small weight to the end of your rope. Toss the weight over the branch, making sure the rope goes over the branch and hangs down on both sides. This might take a few tries, so don’t get discouraged!
- The Hang:
- Method 1 (PCT Method): Tie one end of the rope to your food sack. Pull the sack up until it’s high enough, then tie the other end of the rope to a stick or another object on the ground. This prevents the bag from being pulled down easily.
- Method 2 (Two-Branch Method): You can also use two branches for a more secure hang. Tie the rope to the bag, then hoist it between two branches, securing the other end to the ground or another tree.
- Check Your Hang: Make sure the bag is at least 10 feet off the ground and 4 feet away from the trunk. It should also be hanging away from any other trees or branches that a bear could use to climb.
- Securing the Rope: Tie off the rope securely at ground level. This prevents easy access to the bag and makes it harder for critters to mess with it.
Important Note: Always check local regulations. Some areas require specific bear-resistant canisters instead of bear bags.
Packing Food in a Food Sack to Maximize Space and Prevent Odor Leakage
Packing your food sack efficiently is a total game-changer. It’s all about maximizing space and minimizing those tempting smells that attract critters. Here’s how to pack like a pro:
- Food Selection: Choose lightweight, compact, and non-perishable foods. Think dehydrated meals, energy bars, nuts, and dried fruit. Ditch the bulky packaging!
- Repackaging: Remove food from its original packaging whenever possible. This saves space and reduces odor. Use resealable bags (like Ziploc bags) or specialized food storage bags to repackage food.
- Layering: Place the heaviest items at the bottom of the sack and the lightest items at the top. This helps to distribute the weight and makes the bag easier to carry.
- Odor Control:
- Double Bagging: Place food items with strong odors (like cheese or fish) in two or even three layers of resealable bags.
- Use Odor-Proof Bags: Consider using odor-proof bags for extra protection.
- Avoid Strong Smells: Don’t pack scented items like soap or toothpaste in your food sack.
- Compressing: Squeeze out excess air from the bags before sealing them. This helps to compress the food and save space.
- Seal It Up: Make sure the food sack is tightly sealed to prevent odors from escaping. Roll down the top of the bag and secure it with the closure system.
Example: Imagine you’re packing for a week-long trek. Instead of bringing a whole jar of peanut butter, repack it into a smaller, reusable container. That way, you’re saving space and preventing that peanut butter aroma from wafting through the air.
Cleaning and Maintaining a Food Sack
Keeping your food sack clean is essential for hygiene and preventing those lingering smells that attract unwanted attention. Here’s a step-by-step guide to keeping your sack fresh:
- Empty and Inspect: After each trip, completely empty your food sack and inspect it for any food residue or spills.
- Washing:
- Mild Soap and Water: Wash the inside and outside of the sack with mild soap and warm water. Avoid harsh chemicals or strong detergents.
- Rinse Thoroughly: Rinse the sack thoroughly to remove all traces of soap.
- Drying:
- Air Dry: Hang the sack upside down in a well-ventilated area to air dry completely. Make sure it’s completely dry before storing it.
- Avoid Direct Sunlight: Avoid drying the sack in direct sunlight, as this can damage the fabric.
- Odor Removal:
- Baking Soda: Sprinkle baking soda inside the sack to absorb odors. Let it sit for a few hours or overnight, then shake out the baking soda.
- Vinegar Solution: For stubborn odors, mix equal parts water and white vinegar in a spray bottle. Spray the inside of the sack and let it air dry.
- Storage: Store your clean and dry food sack in a cool, dry place. Avoid storing it in direct sunlight or damp areas.
- Repairing: Inspect your food sack regularly for any rips or tears. Repair any damage promptly to prevent further deterioration. Use a patch kit or sewing skills.
Pro Tip: Always clean your food sack immediately after a trip to prevent odors from setting in. Don’t let that nasi lemak smell linger!
Alternative Food Storage Methods
Alright, so you’ve got your food sack game down, but let’s be real, there are other ways to keep your grub safe from critters in the wild. Sometimes, a food sack just isn’t enough, or maybe it’s not the best option for your particular adventure. Let’s explore some alternatives, Pontianak style, shall we?
Bear Canister: Pros and Cons
A bear canister is basically a super-tough, hard-sided container designed to be impenetrable to bears (and other animals). Think of it as a fortress for your food. It’s a common alternative to food sacks, especially in areas with a high bear population or regulations mandating their use.
- Pros:
- Superior Protection: Bear canisters are incredibly effective at keeping bears out. They’re tested and certified to withstand bear attacks.
- Ease of Use: They’re relatively simple to use; just pack your food inside, close the lid securely, and store it on the ground or in a designated storage area.
- Odor Containment: The hard-sided design and tight seals help to contain food odors, minimizing the chances of attracting bears.
- Regulations Compliance: In many national parks and wilderness areas, bear canisters are required. Using one ensures you’re following the rules.
- Versatility: Canisters can often double as a seat or a small table.
- Cons:
- Weight: Bear canisters are heavy, adding significant weight to your pack.
- Bulk: They’re bulky and can take up a lot of space in your backpack. Packing efficiently is key.
- Cost: Bear canisters can be expensive.
- Limited Capacity: The rigid shape and size restrictions can make it tricky to pack all your food efficiently. You might need to repackage food items to fit.
- Inconvenience: You have to carry the canister everywhere, even when you’re not near bears (or the regulations require it).
Comparison of Food Sacks and Other Storage Methods
Let’s break down how food sacks stack up against other methods like storing food in your tent.
- Food Sack vs. Tent Storage: Storing food
-inside* your tent is generally not recommended. Bears, rodents, and other animals can easily tear through tent fabric. Even if your tent seems sturdy, it’s not a reliable barrier. Plus, you’re basically inviting unwanted guests to share your sleeping space. - Food Sack vs. Bear Canister:
- Protection: Bear canisters offer superior protection against bears. Food sacks are effective if hung correctly, but hanging can fail.
- Weight: Food sacks are significantly lighter than bear canisters.
- Bulk: Food sacks are less bulky and can be packed more flexibly.
- Ease of Use: Bear canisters are easier to use; food sacks require proper hanging techniques.
- Cost: Food sacks are generally cheaper than bear canisters.
Minimizing Food-Related Waste in the Backcountry, Backpacking food sack
Being mindful of waste is crucial for protecting the environment. Here’s how to minimize food-related waste on your backpacking trips:
- Plan Your Meals Carefully: Estimate your food needs accurately to avoid bringing too much.
- Repackage Food: Remove excess packaging at home and repackage food into reusable bags or containers. This reduces the amount of trash you generate.
- Choose Minimal Packaging: Opt for foods with minimal packaging or packaging that is easy to pack out (like foil pouches instead of bulky boxes).
- Eat Everything: Try to consume all of your food. Avoid leaving any leftovers that could attract animals.
- Pack Out All Trash: Carry out all food wrappers, packaging, and any other trash you generate. This includes small items like tea bags and fruit peels.
- Burn Food Waste (When Permitted): In some areas, you can burn certain food waste (like paper and food scraps) in a campfire, but only if it’s allowed and you follow all local regulations. Always check fire restrictions.
- Proper Disposal of Leftovers: If you have any unavoidable food scraps, pack them out in a smell-proof bag. Do
-not* bury food scraps, as they can attract animals.
Preventing Animal Encounters
Dah sampai part paling penting nih, guys! Backpacking itu seru, tapi ketemu binatang liar yang lagi nyari makan itu nggak banget. Kita harus pintar-pintar jaga diri dan makanan kita biar nggak bikin masalah. Intinya, kita mau backpacking, bukan mau jadi santapan!
Minimizing Food Odors
Bau makanan itu kayak magnet buat binatang, apalagi yang hidungnya tajam. Makanya, kita harus mati-matian ngurangin bau makanan yang nyebar.
- Packing Makanan yang Rapi: Bungkus makanan rapat-rapat. Gunakan kantong kedap udara, ziplock, atau wadah yang bisa nahan bau. Double-bagging juga oke, biar lebih aman.
- Masak dengan Bijak: Kalau masak, jangan sampai makanan tumpah atau gosong. Bersihin semua sisa makanan dan sampah setelah selesai masak.
- Jauhkan Diri dari Tempat Tidur: Jangan sekali-kali nyimpen makanan di tenda, apalagi di dekat tempat tidur. Bau makanan bisa nempel di tenda dan bikin binatang tertarik.
- Cuci Peralatan Masak: Cuci bersih semua peralatan masak setelah dipakai. Sisa makanan yang nempel bisa jadi sumber bau yang menarik perhatian binatang.
- Simpan Makanan di Tempat yang Aman: Simpan makanan di food sack, bear canister, atau cara penyimpanan yang aman lainnya. Jauhkan dari jangkauan binatang.
Critical Areas for Bear-Resistant Methods
Di beberapa tempat, aturan mainnya lebih ketat. Kita wajib pakai cara penyimpanan makanan yang tahan sama beruang, karena beruang emang jagoan dalam urusan nyari makanan.
- Taman Nasional dan Hutan Lindung: Hampir semua taman nasional dan hutan lindung di Amerika Serikat mewajibkan penggunaan bear canister atau cara menggantung makanan yang benar. Ini penting banget buat ngejaga keamanan pengunjung dan juga melindungi beruang dari kebiasaan buruk nyari makanan dari manusia.
- Daerah dengan Populasi Beruang Tinggi: Di daerah yang banyak beruangnya, kayak di pegunungan Rocky atau Alaska, cara penyimpanan makanan yang tahan beruang itu wajib. Beruang di sana udah biasa nyari makanan manusia, jadi kita harus lebih hati-hati.
- Area dengan Riwayat Masalah Beruang: Kalau ada laporan tentang beruang yang sering nyuri makanan dari manusia, kita harus ekstra waspada. Gunakan cara penyimpanan makanan yang paling aman.
Campsite Selection
Pilih tempat kemah yang bener juga penting buat ngurangin risiko ketemu binatang. Jangan asal pasang tenda aja, guys!
- Jauh dari Jalur Binatang: Cari tempat kemah yang jauh dari jalur binatang. Jangan pasang tenda di dekat jalur sungai, jalur setapak, atau area yang sering dilewati binatang.
- Perhatikan Tanda-Tanda Kehadiran Binatang: Perhatiin tanda-tanda kehadiran binatang, kayak jejak kaki, kotoran, atau bekas garukan di pohon. Kalau ada tanda-tanda ini, mending cari tempat lain.
- Bersih dari Sisa Makanan: Pastikan tempat kemah bersih dari sisa makanan. Bersihin semua remah-remah, bungkus makanan, dan sampah lainnya.
- Jauhkan Makanan dari Tenda: Simpan makanan jauh dari tenda, minimal 60 meter. Ini penting banget buat ngurangin risiko binatang nyamperin tenda kita.
- Perhatikan Angin: Usahakan tempat kemah berada di area yang anginnya nggak terlalu kencang. Angin yang kencang bisa nyebarin bau makanan lebih jauh.
Innovations in Food Sack Technology
Alright, dengar sini, para pencinta alam! Food sacks, si kantong ajaib buat makanan kita pas nge-backpacking, terus berevolusi. Dari yang cuma karung kain biasa, sekarang udah banyak banget inovasi yang bikin hidup di alam bebas makin nyaman dan aman. Kita bakal bahas perkembangan terkini, dampak positifnya, dan apa yang mungkin terjadi di masa depan.
Advancements in Food Sack Materials and Designs
Material-material food sack sekarang makin canggih, bukan cuma kuat tapi juga ringan. Desainnya juga makin mikirin efisiensi dan kemudahan penggunaan.
- Ultra-High-Molecular-Weight Polyethylene (UHMWPE) Fabrics: Bahan ini, contohnya Dyneema, jadi primadona karena kekuatan dan beratnya yang super ringan. Food sack dari UHMWPE tahan robek, tahan tusuk, dan ringan banget, jadi gak nambah beban di ransel. Bayangin aja, kekuatan baja tapi seringan bulu!
- Waterproof and Airtight Closures: Penutup food sack sekarang udah makin canggih, kayak roll-top atau zipper kedap udara. Ini penting banget buat ngejaga makanan tetep kering dan mencegah bau makanan nyebar yang bisa menarik perhatian binatang.
- Integrated Hanging Systems: Beberapa food sack udah dilengkapi dengan sistem gantung yang praktis, kayak tali yang kuat dan ring D. Jadi, tinggal gantung di pohon, deh, tanpa ribet.
- Bear-Resistant Designs: Buat daerah yang banyak beruang, food sack dirancang khusus dengan bahan yang tahan gigitan dan robekan. Beberapa bahkan punya bentuk yang susah diakses beruang.
Impact of Innovations on Weight, Durability, and Usability
Inovasi-inovasi ini punya dampak besar banget buat pengalaman backpacking kita.
- Weight Reduction: Bahan-bahan baru kayak UHMWPE bikin food sack jauh lebih ringan, yang berarti kita bisa bawa lebih banyak makanan atau peralatan lain.
- Increased Durability: Food sack sekarang lebih tahan lama, tahan terhadap robekan, tusukan, dan cuaca ekstrem. Jadi, gak gampang rusak pas kena gesekan di bebatuan atau ranting pohon.
- Enhanced Usability: Desain yang lebih praktis, kayak sistem gantung dan penutup kedap udara, bikin penggunaan food sack jadi lebih mudah dan efisien. Gak perlu lagi deh, repot-repot mikirin cara gantung makanan yang aman.
“Inovasi food sack modern bukan cuma soal bahan dan desain, tapi juga tentang pengalaman backpacking yang lebih baik dan lebih aman. Ini adalah investasi kecil yang memberikan dampak besar.”
Future Trends in Food Storage for Backpackers
Masa depan food sack kayaknya bakal makin seru, nih!
- Smart Food Sacks: Mungkin nanti ada food sack yang dilengkapi sensor buat ngedeteksi bau makanan dan ngasih peringatan kalau ada binatang yang mendekat. Atau, food sack yang bisa ngitung kalori makanan yang kita simpan.
- Sustainable Materials: Bakal makin banyak food sack yang dibuat dari bahan-bahan yang ramah lingkungan, kayak bahan daur ulang atau bahan yang bisa terurai.
- Customization and Personalization: Mungkin nanti kita bisa bikin food sack sesuai kebutuhan dan gaya kita, mulai dari ukuran, warna, sampe fitur-fitur tambahan.
Food Sack Accessories and Related Gear
Ayo, so you’ve got your food sack, yeah? But lemme tell you, it’s not just the sack itself that matters. You need some extra gear to make sure your food stays safe from those sneaky critters, especially the ones with claws and teeth. Think of these accessories as your food sack’s best friends, helping you hang it right and keep everything secure.
Let’s dive into the must-haves and how to use ’em, Pontianak style.
Essential Accessories
Choosing the right accessories can make or break your bear-hanging game. You need stuff that’s strong, reliable, and easy to use, even when you’re tired after a long day of trekking. Here’s the lowdown on the essential gear:
- Rope: This is the backbone of your hanging system. You need a strong, durable rope to hoist your food bag high enough to keep it out of reach.
- Carabiners: These metal clips are super handy for connecting the rope to your food sack and to the tree branches. Get a few, just in case.
- Stuff Sacks: Keep your food organized inside the food sack, and a separate stuff sack for the rope and other hanging accessories helps prevent tangles and keeps things tidy.
Choosing the Right Rope and Other Hanging Accessories
Picking the right rope and accessories isn’t rocket science, but you do need to think about a few things. You want gear that’s tough enough to handle the weight of your food and the elements, and that’s easy to use even when you’re tired. Here’s what to consider:
- Rope Type: Look for static or low-stretch rope. Dynamic ropes, used for climbing, have too much give and aren’t ideal. Paracord can be used, but it’s not as strong or durable as dedicated climbing or bear bag rope.
- Rope Length: Get enough rope! A good rule of thumb is at least 50 feet (15 meters), maybe more, to give you plenty of reach for finding a good hanging spot.
- Rope Diameter: A rope diameter of 5-7 mm is generally a good balance between strength and weight. Thicker ropes are stronger but heavier.
- Carabiner Type: Get locking carabiners for the best security. Non-locking ones can work, but they’re less secure and can accidentally open.
- Stuff Sack Material: Choose a stuff sack made from durable, water-resistant material to protect your gear from the elements.
Bear Bag Hanging System Setup
Setting up a bear bag system is crucial for keeping your food safe and avoiding unwanted encounters with bears and other animals. It’s not as hard as it looks, but it does take practice. Here’s how to do it, step-by-step:
- Find the Right Tree: Look for a sturdy tree with a branch that’s at least 10-12 feet (3-3.5 meters) off the ground and far enough away from the trunk that a bear can’t easily reach the bag. Make sure there are no other trees or branches nearby that a bear could climb to access the bag.
- Throw the Rope: Attach a small weight (like a rock or a throw bag) to the end of your rope. Throw the weight over the chosen branch. You might need a few tries!
- Attach the Food Sack: Once the rope is over the branch, detach the weight and attach the rope to your food sack using a carabiner. Make sure the carabiner is securely locked.
- Hoist the Bag: Pull the rope to hoist the food sack up to the branch. Get the bag as high as possible, at least 10 feet off the ground.
- Secure the Rope: Tie off the rope to a sturdy point on the tree trunk, away from the base of the tree. Make sure the knot is secure and that the rope is taut. A simple Prusik knot is an excellent option for adjusting the height later if needed.
- The “Counterbalance” Method (Alternative): Another common method involves using two trees. Throw the rope over a branch on one tree, attach the food bag, and then use a second rope attached to the bag and over a branch on a second tree. This allows you to pull the bag horizontally, making it more difficult for animals to access.
Remember: Practice this setup at home before your trip. This way, you’ll be familiar with the steps and can set it up quickly and efficiently when you’re in the backcountry. It’s also a good idea to pack all your food and scented items in the food sack before you start looking for a place to hang it, to save time.
Legal and Ethical Considerations: Backpacking Food Sack
Alright, so you’re packin’ your food sack, ready to hit the trails. But before you go chugging that electrolyte drink and dreaming of sunset views, lemme give you the lowdown on the legal and ethical stuff. This ain’t just about keepin’ your grub safe; it’s about respectin’ the environment, the wildlife, and the law. Trust me, gettin’ this right is way more important than that perfect Instagram shot.
Local Regulations for Food Storage
Before you even think about where to hang your food sack, you gotta know the rules of the game. Different parks and wilderness areas have their own regulations, and ignorin’ ’em can land you in some serious hot water – think hefty fines or even a ban from the area.
- Park-Specific Rules: Each park, national forest, or wilderness area often has its own set of regulations. These can vary widely depending on the local wildlife, the environment, and the park’s management plan. For example, some areas might mandate the use of bear-resistant canisters, while others might only require proper food storage techniques, like hanging your food bag. Always check the specific regulations for the area you’re visitin’.
You can usually find this info on the park’s website, at the ranger station, or in the permit you receive.
- Mandatory Bear Canister Areas: Certain areas, especially those with high bear populations or a history of human-bear conflicts, might
-require* the use of bear-resistant canisters. These are basically bomb-proof containers that bears can’t get into. It’s crucial to know if the area you’re headin’ to requires one, ’cause if you don’t have it, you ain’t gettin’ in. Some parks, like Yosemite National Park, are well-known for their mandatory canister policies. - Food Storage Methods: Even if a bear canister ain’t required, most areas will have specific guidelines on how you should store your food. This might include hanging your food bag (the “PCT hang” is a common method), storing it in a bear-resistant container, or stashing it in a designated food locker. Failing to follow these guidelines can result in a citation.
- Permits and Reservations: Some wilderness areas require permits or reservations, and these permits often include specific instructions on food storage. Make sure you read and understand the conditions of your permit. It’s a good idea to do this before you even start packin’.
- Penalties for Non-Compliance: Ignoring food storage regulations can result in fines, the seizure of your food and gear, or even a ban from the park. The penalties are in place to protect both humans and wildlife.
Responsible Backcountry Practices
Okay, so you’ve got the legal stuff down. Now, let’s talk about being a good steward of the backcountry. This means makin’ choices that minimize your impact on the environment and keep wildlife wild.
- Wildlife-Proofing Your Campsite: Beyond just storing your food, it’s about makin’ your whole campsite unattractive to animals. This means keepin’ your cooking area clean, properly disposing of food scraps, and never feedin’ wildlife.
- Proper Food Disposal: Don’t just bury your food scraps; that’s a big no-no. Animals can smell ’em and will dig ’em up. Pack out all food scraps, including apple cores, orange peels, and even coffee grounds. This can be a pain, but it’s essential.
- Campfire Considerations: If you’re havin’ a campfire, make sure you burn all food-related items completely, and then scatter the ashes. Don’t leave any evidence of your presence.
- Respecting Wildlife Space: Observe wildlife from a distance and never approach them. Giving animals space helps them maintain their natural behaviors and prevents them from becoming habituated to humans.
- Reporting Wildlife Encounters: If you do have a wildlife encounter, report it to the park rangers. This helps them monitor wildlife activity and manage potential conflicts.
Leave No Trace Principles for Food Storage
Leave No Trace (LNT) ain’t just a trendy phrase; it’s a set of principles designed to minimize your impact on the environment. When it comes to food storage, these principles are especially important.
- Plan Ahead and Prepare: Before you even hit the trail, plan your meals carefully to minimize food waste. Pack only what you need and repackage food to reduce packaging.
- Travel and Camp on Durable Surfaces: Stick to established trails and campsites to avoid damaging vegetation. This also helps to keep animals away from your campsite.
- Dispose of Waste Properly: Pack out
-everything*, including food scraps, wrappers, and trash. This also includes packing out all toilet paper and feminine hygiene products. - Leave What You Find: Don’t take anything from the environment, including plants, rocks, or artifacts. Leave everything as you found it.
- Minimize Campfire Impacts: If fires are allowed, use established fire rings and burn wood completely. Be mindful of fire bans.
- Respect Wildlife: Observe wildlife from a distance, never feed them, and store food properly to prevent them from getting habituated to humans.
- Be Considerate of Other Visitors: Respect other hikers and campers. Keep your campsite clean and quiet.
End of Discussion
In conclusion, the backpacking food sack is an essential tool for any backcountry adventurer. By understanding the different types, choosing the right one for your trip, and following best practices for usage, you can ensure your food is safe from animals, protect the environment, and enjoy a worry-free experience. Remember, responsible food storage is a key component of Leave No Trace principles, allowing us all to appreciate the beauty of the wilderness for years to come.


